There is nothing quite like the crackle of fresh Kadi Patta hitting hot oil in an iron kadai. Whether it’s a comforting bowl of South Indian upma, a aromatic Maharashtrian poha, or a rich North Indian tadka dal, curry leaves are the undisputed heartbeat of Indian home cooking.
Because we use them almost daily, having a steady, fresh supply right in your balcony or backyard is a total game-changer. No more running to the local sabziwala just for a handful of wilted leaves!
While most nurseries sell saplings, learning how to grow curry leaf plant from cuttings in India is a deeply satisfying and cost-effective alternative. It lets you replicate a prized, highly aromatic mother plant from a neighbor or relative’s garden for free. However, if you have tried sticking a random stem into a pot before, you probably watched it turn black and dry up within a week.
Do not worry! Rooting Kadi Patta (Murraya koenigii) from a cutting isn’t impossible; it just requires a specific scientific approach adapted to the unique Indian climate. Let’s break down exactly why cuttings fail and how you can successfully root them the right way.
Can Curry Leaf Really Grow From Cuttings?
The short answer is: Yes, absolutely!
In botanical terms, curry leaf plants are capable of vegetative propagation. This means a piece of the stem contains specialized cells that can differentiate and develop completely new root systems under the right environmental conditions.
When you successfully grow a plant from a stem cutting, you are essentially creating a genetic clone of the parent tree. If the parent plant produces incredibly fragrant, small dark leaves, your new plant will have those exact same traits. This gives cutting propagation a massive edge over growing from seeds, which can sometimes result in weaker variations.
Why Many Curry Leaf Cuttings Fail
If it’s entirely possible, why do so many Indian home gardeners struggle with it? Understanding the pitfalls saves you weeks of frustration. Here are the top three reasons your Kadi Patta stems might be dying:
- Fungal Rot (The Biggest Killer): The warm, damp environment needed to initiate roots is also a breeding ground for soil-borne fungi. Without proper sterilization or drainage, the submerged tip of the stem rots before it can sprout roots.
- Dehydration: A cut stem has zero roots to pull up water. If the leaves on the cutting evaporate moisture faster than the stem can absorb it, the cutting completely dries out within days.
- Using the Wrong Stem Type: Trimming a tender, bright-green tip or a massive, woody bark branch usually ends in failure. The green ones wilt instantly, and the ultra-hardwood ones take way too long to generate new cells.
Best Season for Propagation in India
Timing is absolutely everything when it comes to rooting Kadi Patta. You cannot expect a cutting to root during the extreme dry heat of May or the cold, dormant winter months of December and January.
The absolute best times to execute this process are:
- The Monsoon Season (July to September): This is the gold-standard window across India. The atmospheric humidity is naturally sky-high, which keeps the exposed stem hydrated, and the ambient temperatures remain warm enough to accelerate cellular growth.
- Early Spring (Late February to March): As winter recedes and the plant enters its active spring growth spurt, the rising sap levels inside the wood make it highly receptive to rooting.
Selecting Semi-Hardwood Cuttings
Step away from the fragile green tips! To successfully master how to grow curry leaf plant from cuttings in India, you must look for semi-hardwood stems.
How to Identify Semi-Hardwood
Look at a branch from the top down. The topmost part is soft and bright green. The base of the branch near the main trunk is thick, dark brown, and covered in rough bark. The sweet spot right in the middle—where the stem transitions from green to a light grayish-brown—is your semi-hardwood zone.
Preparing the Stem
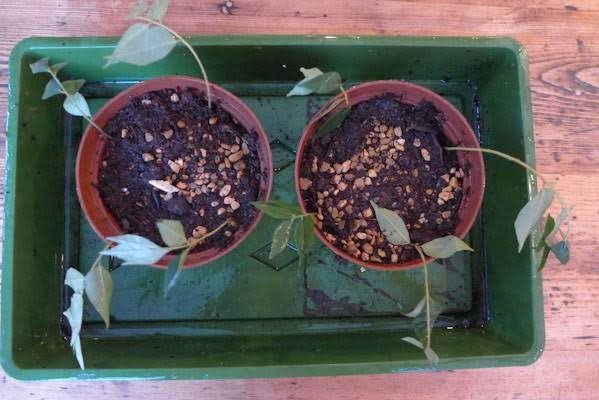
- Cut a pencil-thick stem that is roughly 5 to 6 inches long.
- Always use a sharp, sanitized pair of pruning shears. Make a clean, 45-degree angle cut just below a leaf node (the bump where leaves sprout). A slanted cut provides a larger surface area for roots to emerge and prevents the stem from sitting flat on the bottom of the pot, which blocks water intake.
- Strip away all the lower leaves, leaving only 2 to 3 small leaves at the very top. This minimizes the surface area losing water through transpiration.
Rooting Hormone vs. Natural Alternatives
Because curry leaf stems are notoriously stubborn rooters compared to money plants or hibiscus, using a rooting agent drastically improves your success rate.
Commercial Rooting Hormone
A synthetic IBA (Indole-3-butyric acid) rooting powder or gel works exceptionally well. You simply dip the bottom one inch of the damp cutting into the powder before planting.
Organic Indian Kitchen Alternatives
If you prefer to keep your kitchen garden purely organic, you can find excellent natural rooting catalysts right in your spice box:
- Honey and Cinnamon Powder: Honey has natural antibacterial properties that protect the cut from fungal rot, while cinnamon acts as a mild anti-fungal shield. Dip the stem tip in honey, then roll it lightly in cinnamon powder.
- Fresh Aloe Vera Gel: Dip the cut end directly into a freshly sliced aloe vera leaf. The enzymes help protect the open plant tissue and stimulate root development.
The Ultimate Soil Mix for Rooting
Never plant your delicate cuttings directly into heavy, clay-rich garden soil (kali mitti). It packs down too tightly, choking off oxygen and trapping excessive moisture around the base of the stem.
You need an ultra-light, highly porous substrate that allows tiny new roots to push through effortlessly without drowning.
The Perfect Rooting Mix Recipe
Combine the following ingredients thoroughly:
- 40% Coarse River Sand or Perlite: Provides maximum drainage and creates essential air pockets.
- 40% Coco Peat: Holds just enough uniform moisture so the cutting never completely dries out.
- 20% Aged Vermicompost or Leaf Mold: Offers a tiny touch of gentle nutrition without burning the nascent roots.
Ensure your starter pot or plastic seedling cup has multiple, clear drainage holes at the bottom. Fill the pot, water it thoroughly once to let the medium settle, and use a stick or pencil to poke a hole down into the mix. Never push the cutting directly into the soil, as this rubs off your rooting hormone!
Step-by-Step Propagation: The Humidity Cover Method
Because maintaining moisture balance is the trickiest part of learning how to grow curry leaf plant from cuttings in India, utilizing a DIY greenhouse setup is highly recommended. Follow this step-by-step procedure for the best results:
1.Prepare and Insert the Cutting:Immediate.
Dip your prepared 5-inch semi-hardwood stem into your chosen rooting agent. Insert it roughly 2 inches deep into the pre-poked hole in your potting mix, firming the soil around the base so the stem stands completely stable.
2.Construct the Humidity Tent:Critical for Hydration.
Take a clear plastic bottle (like a recycled soft drink bottle) with the bottom cut off, or a clear plastic bag. Invert it over the pot to enclose the cutting completely. This traps the evaporating moisture, creating a self-sustaining humid microclimate that keeps the leaves hydrated without overwatering the soil.
3.Choose the Right Location:Placement Check.
Place the pot in a warm spot that receives bright, indirect sunlight. Never place it in direct afternoon sun, or the plastic cover will turn into an oven and cook the cutting alive. A shaded balcony or under a larger canopy tree is perfect.
4.Monitor with Minimal Intervention:3 to 5 Weeks.
Only water if the top inch of the soil looks noticeably dry. You should see condensation droplets forming on the inside of the plastic cover—this means the system is working perfectly. Resist the urge to tug on the stem to check for roots!
When to Transplant to a Permanent Pot
Within 4 to 6 weeks, you will likely notice bright green new leaves bursting from the top nodes of the stem. This is an exciting sign, but it doesn’t mean the plant is ready for heavy field duty just yet.
The Root Check
Wait until you see roots peeking out from the bottom drainage holes, or until the new leaf growth has fully unfurled and looks strong.
Hardening Off
Before moving your new sapling into a large pot under full sunlight, you must gradually acclimate it to the real world:
- Remove the plastic cover for 2 hours a day for a week.
- Slowly increase the exposure time over the next week until the cover is completely off.
- Carefully transplant the root ball into a larger 10-to-12-inch terracotta pot filled with a richer potting mix (equal parts garden soil, compost, and sand).
Curry Leaf Care After Rooting
Once your rooted cutting is established in its permanent home, maintaining a healthy care routine ensures a bushier plant with highly aromatic leaves.
1. Sunlight Requirements
Curry leaf plants love the Indian sun. Give them at least 5 to 6 hours of direct morning sunlight daily. If you live in regions with extreme summer heat (like Delhi, Rajasthan, or Telangana), consider providing partial afternoon shade during May and June to prevent the leaf tips from scorching.
2. Watering Etiquette
Follow the “soak and dry” method. Water the plant deeply until water runs out of the bottom holes, then don’t water again until the top two inches of soil feel completely dry to the touch. Yellowing, dropping leaves are almost always a symptom of soggy roots and overwatering.
3. Pruning for Maximum Bushiness
If left to grow naturally, a curry leaf plant will shoot straight up like a single tall stick. To get a bushy canopy with tons of branches, you must pinch off the top growing tip once the sapling reaches about a foot in height. This forces the plant to activate its side buds, doubling your leaf yield.
Frequently Asked Questions
Is it better to grow curry leaf from seeds or cuttings?
While seeds germinate easily, they take a long time to grow into a harvestable bush, and the fruit seeds must be planted fresh as they lose viability within days. Cuttings skip the fragile infancy stage, grow faster, and preserve the exact flavor and oil profile of the aromatic parent plant.
Can a curry leaf plant grow indoors?
Curry leaf plants do not thrive long-term in dark indoor rooms. They need high light intensity and proper air circulation. However, you can successfully keep them on a bright, south-facing kitchen window sill or an open apartment balcony that receives plenty of daily sunlight.
My cutting’s leaves fell off. Is it dead?
Not necessarily. Sometimes a cutting drops its old leaves as a stress response while focusing all its remaining energy on building roots underground. As long as the main stem stays plump and green (scratch the bark gently with a fingernail to check for green tissue underneath), keep it under the humidity cover—it may still bounce back with fresh sprouts!
See Also
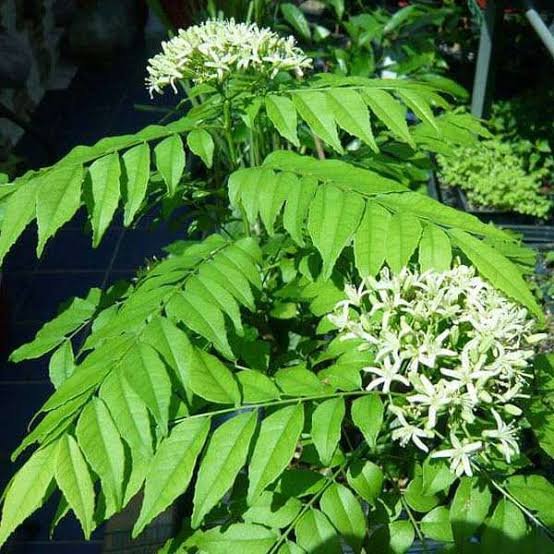
Grow curry leaf plant from cuttings
Right Way To Grow Curry Leaf Plant | SEED TO HARVEST
How to Grow Methi in Pots at Home in India: The Ultimate 20-Day Fenugreek Leaves Guide
How to Grow Coriander in Pots in India Without Bolting